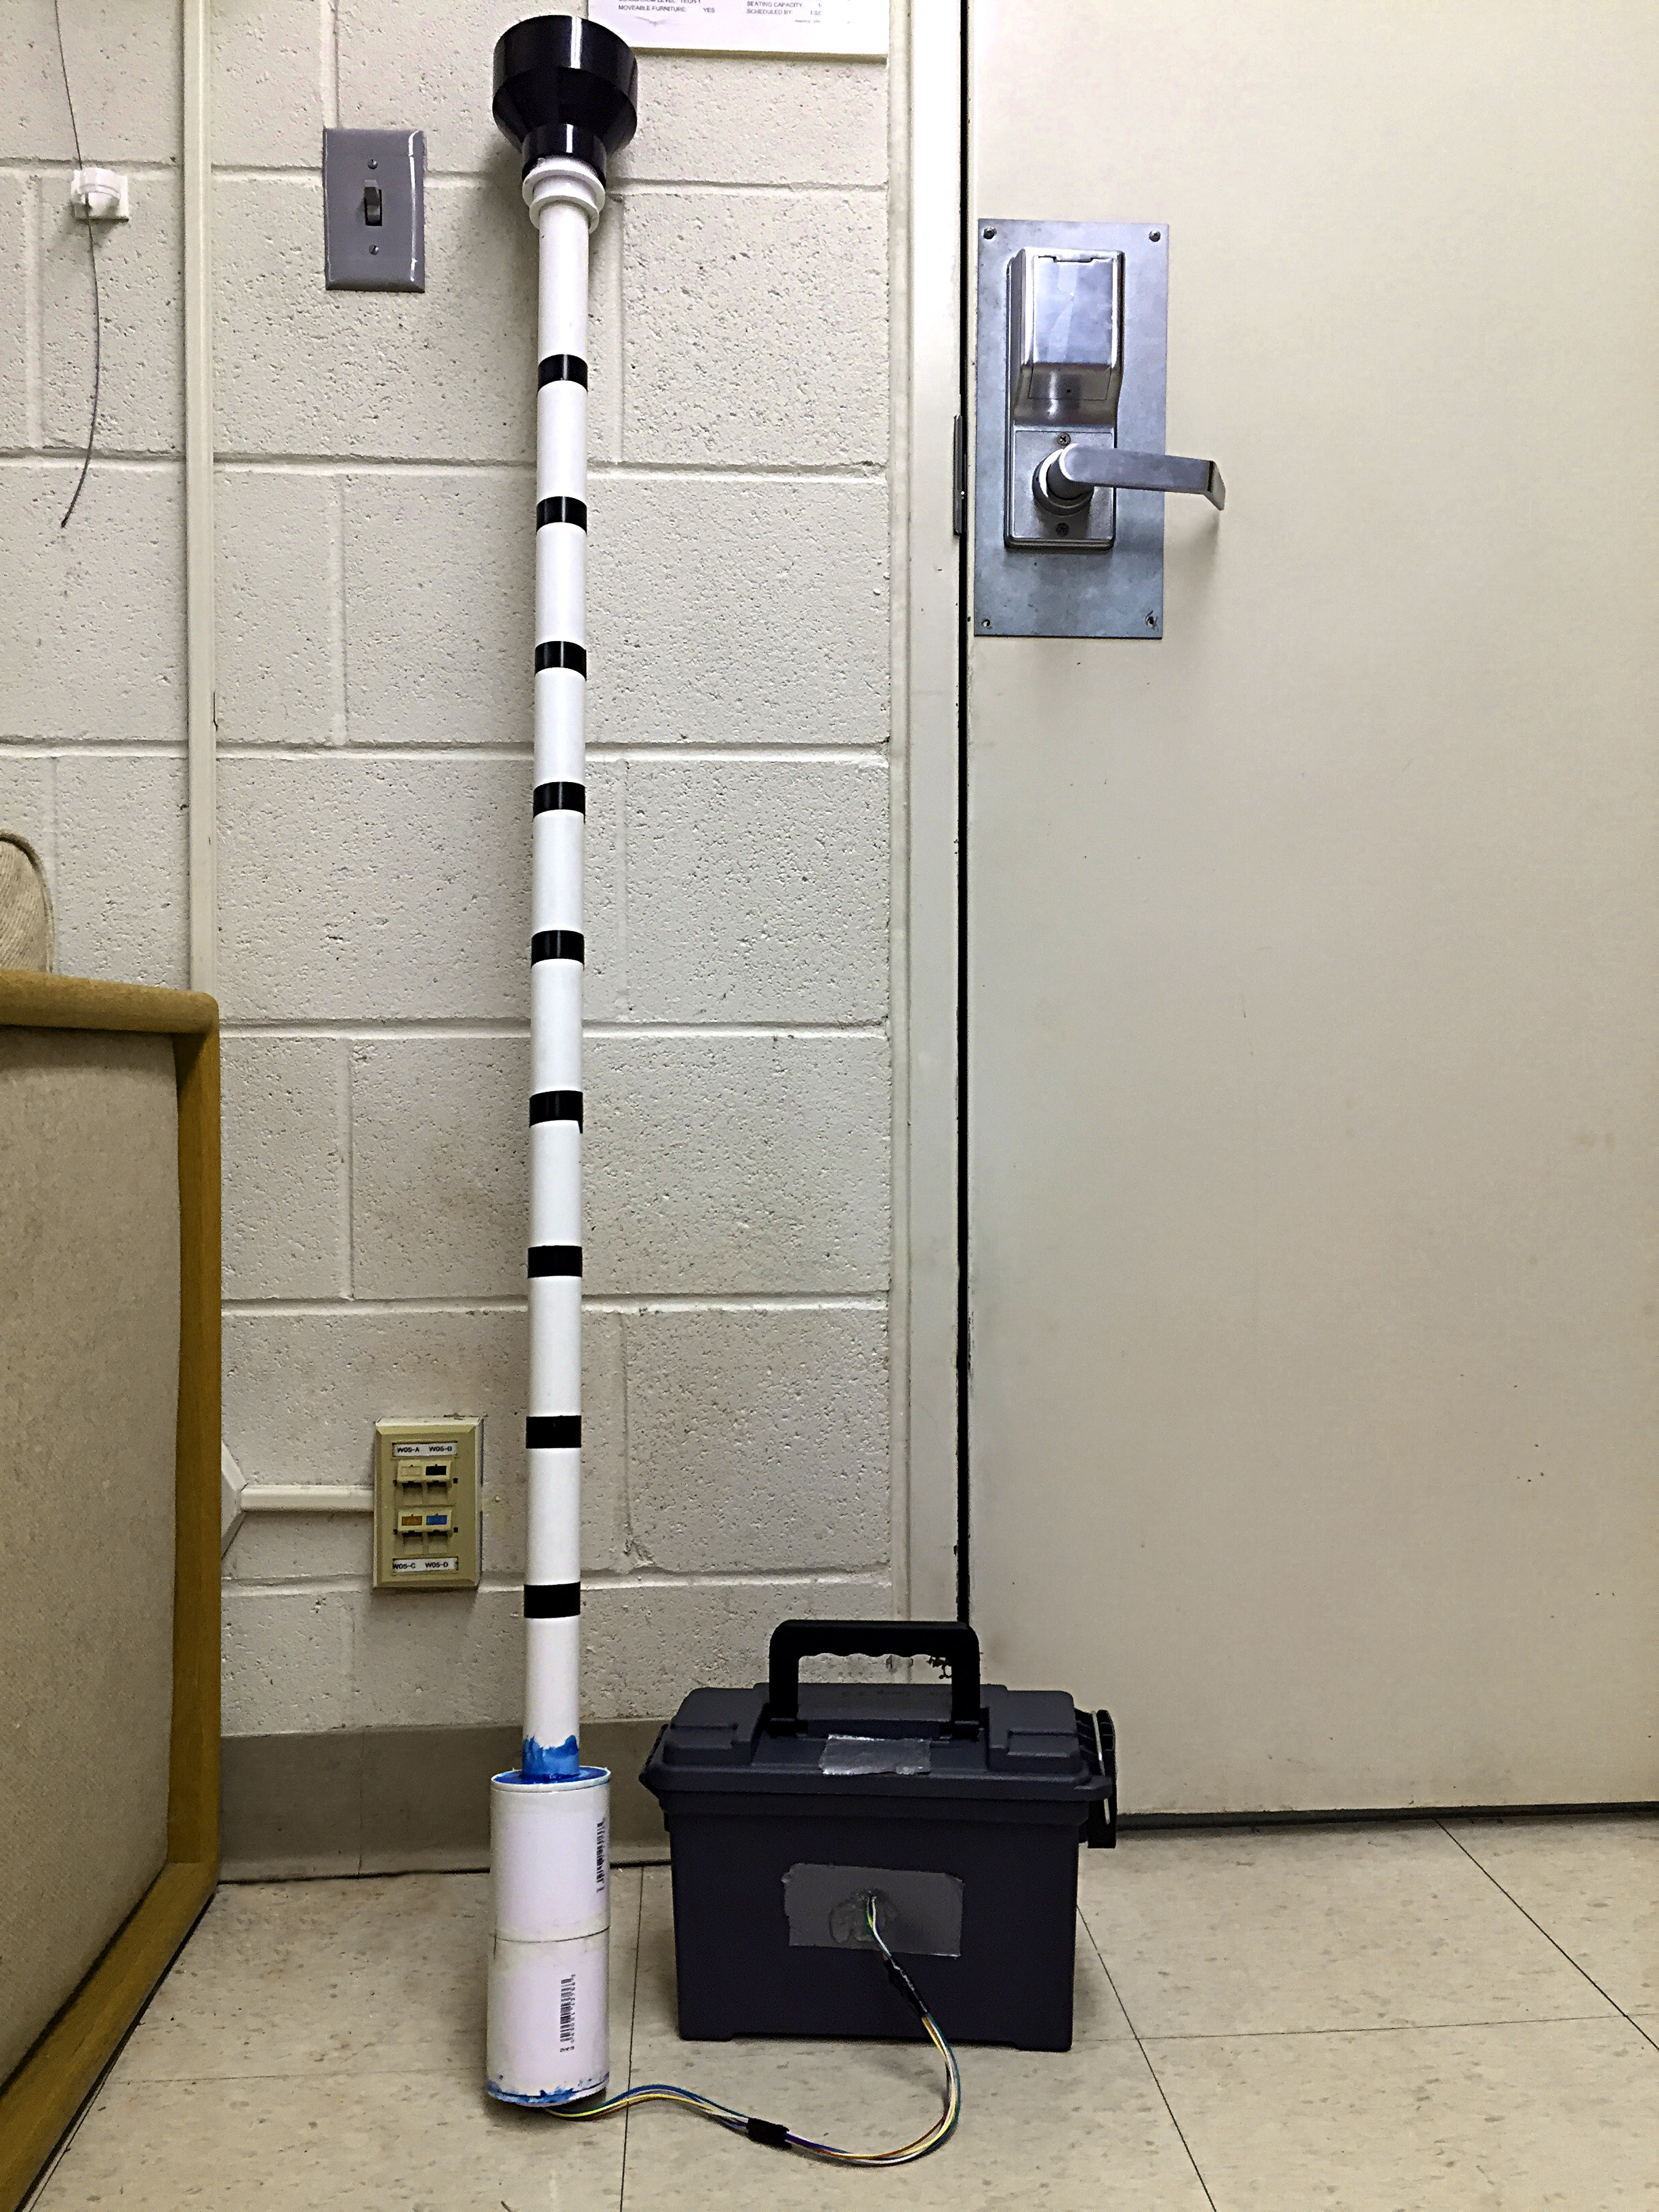
Includes a PVC pipe to hold the rainwater, a cylindrical PVC container that contains the waterproofed pressure sensor, wiring that connects the waterproofed sensor to the rest of the electronics, and a waterproof box that holds those electronics.
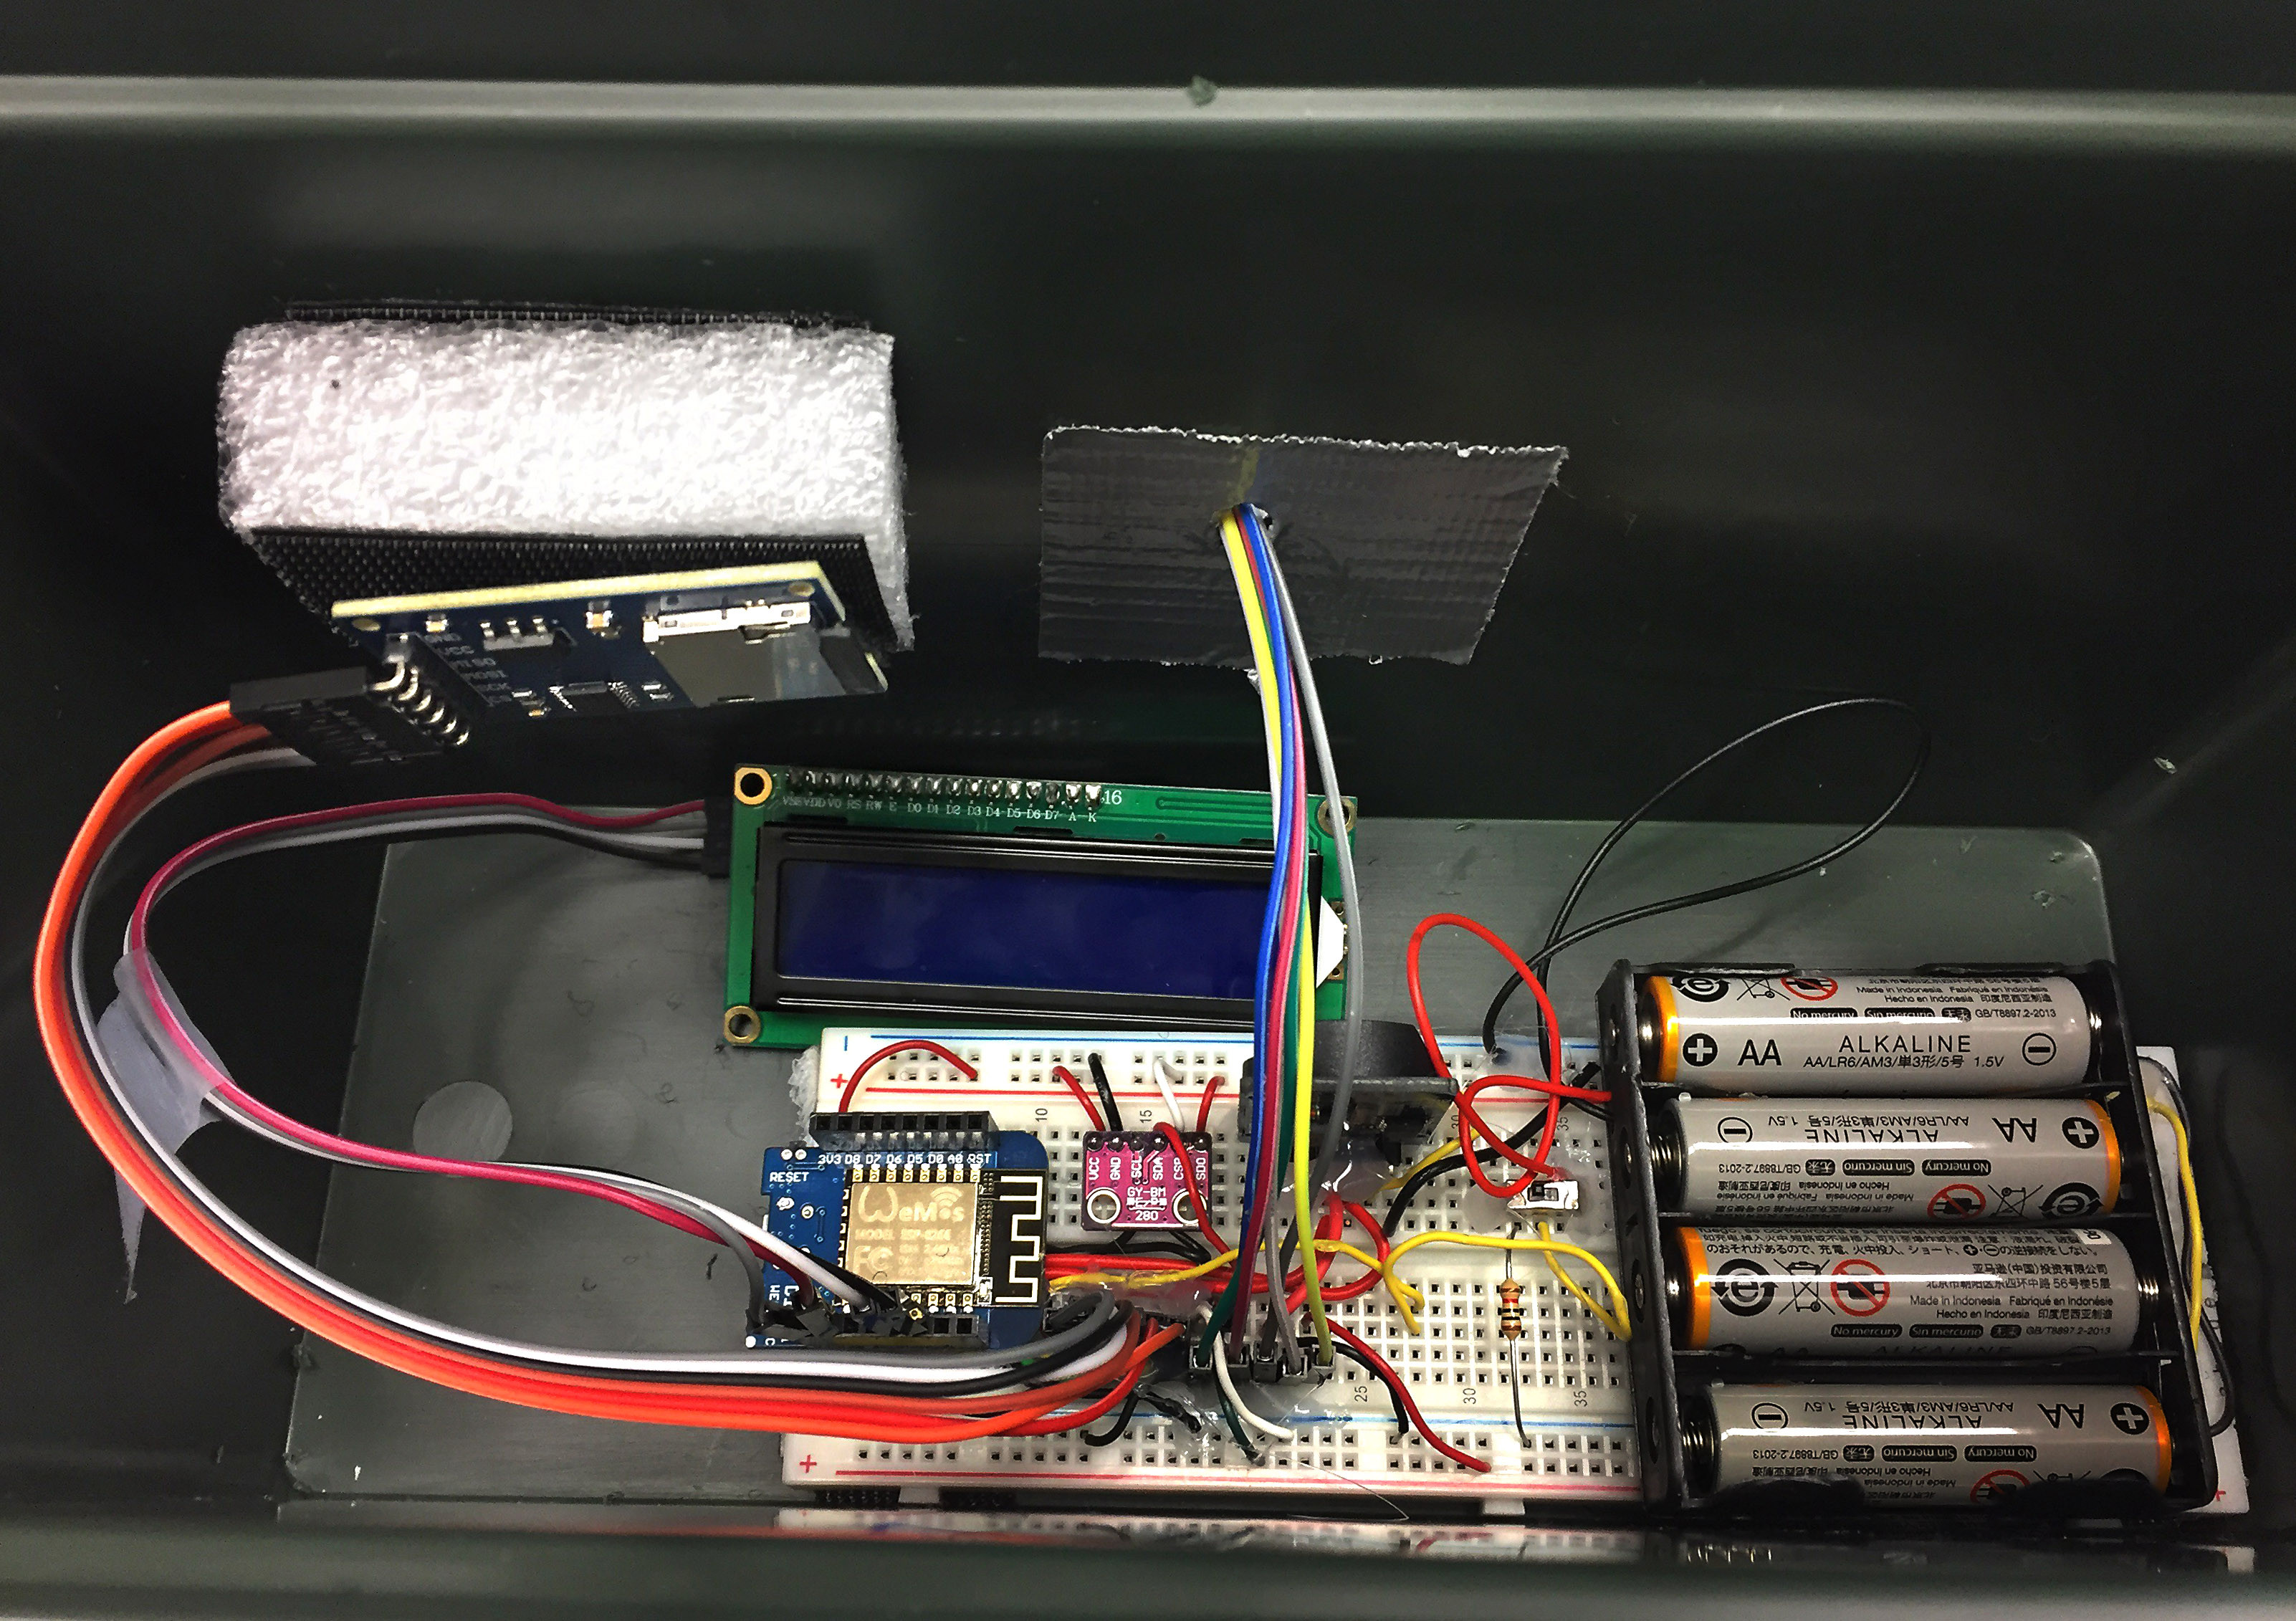
Includes the ESP8266 microcontroller, atmospheric pressure sensor, real time clock, SD card reader, LCD screen, and battery pack.
Overview
For my senior design project, I worked in an interdisciplinary team that included both environmental science students and electrical and computer engineering students. The project's sponsor, Glacier Peak Institute, tasked our team with creating an environmental sensor curriculum for middle school students in Darrington, WA.
The project's requirements were that the curriculum had to be low-cost, fun and interesting for the kids, relevant to the local environment of Darrington, and allowed the kids to enjoy the outdoors. As a result, our team decided to create an electronic rain gauge curriculum.
How the Rain Gauge Works
The physical design of the rain gauge involves a funnel attached to a PVC pipe with a pressure sensor attached to the bottom. The rainwater would be collected in the PVC pipe, where the pressure sensor can measure the pressue due to both the atmosphere and rainwater.
A second pressure sensor is used to measure only the atmospheric pressure. Together, the two pressure sensors can be used to find the differential pressure, as in the pressure due to only the rainwater. After calibration, this differential pressure can be used to calculate the depth of the rainwater contained in the PVC pipe.
The electronics are connected to an ESP8266 microcontroller that is programmed using the Arduino IDE. The code used for the rain gauge logs the differential pressure reading and the current time measured by the real time clock onto a micro-SD card every 15 minutes.
The idea is that the rain gauge can be set outside to automatically collect rain data with minimal maintenance, which includes retrieving the SD card to collect the data and changing the batteries. In contrast, a traditional rain gauge would require the user to manually measure the amount of rainwater through a graduated cylinder and would be limited to how often the user is available to take the measurements, which may not be possible in the middle of a heavy downpour.
What I Did
I interfaced the electronic components with the ESP8266 microcontroller using SPI and I2C. Using the Arduino IDE, I wrote code to control and get data from the components. I also worked on the construction of the rain gauge, including the wiring of the components on the breadboard and the design of the waterproof housing for pressure sensor.
In addition to working on the hardware and software, I held a leadership role in the project. I led team meetings and coordinated communication between our faculty advisors and project sponsor on behalf of our team.
Back